 Most “easy” solar ground mount videos skip the part that either makes or breaks the install: the land! If you’re building on a real homestead – uneven ground, stubborn roots, hidden rock, and a slope that laughs at your level – this post is for you. At Terra Hill Farm, we built a 12-panel IntegraRack ground mount the hard way and we learned the real-world lessons that can save you time, money, and whole lot of frustration.
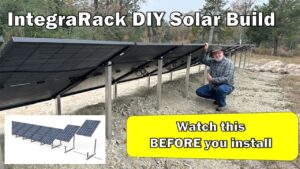
Click here to watch the full IntegraRack Build video on our YouTube Channel, Two Steps from Off-Grid
WHY WE CHOSE INTEGRARACK
IntegraRack is a strong, clean-looking ground mount system that goes together fast once your site is ready. The rack assembly itself is straightforward—but what most videos don’t show is everything it takes to get the ground and layout right before the first bolt goes in.
- GROUND PREP: THE WORK BEFORE THE WORK
Our install started with clearing the area and making it build-ready. We used a tractor for brush and grading, a backhoe for roots and stumps, and a chainsaw for cleanup. We also brought in sand to smooth things out as much as possible.
If you’re installing on country land, plan extra time here. A good foundation saves you headaches later.
2. MEASURING AND LAYOUT: DON’T RUSH IT
With 12 panels, small mistakes turn into big problems fast. We used a laser level and carefully marked our points. Taking your time here is worth it—straight racks make everything else easier.
3. RACK ASSEMBLY: THE FUN PART
Once the ground was prepped, IntegraRack assembly moved quickly. Most videos show a few racks—we built thirteen, and once you get into a rhythm, it’s surprisingly smooth.
4. WEED FABRIC: A MUST FOR LONG-TERM SUCCESS
We laid down commercial-grade weed fabric to keep the site clean and low-maintenance. Cheap fabric won’t last.
This new array sits beside our other two arrays, bringing us to 36 panels total powering life at Terra Hill Farm.
5. SETTING RACKS AND SUPPORT PIPES: LOCKING IN ALIGNMENT
Getting racks straight and evenly spaced is where the earlier measuring pays off. After setting the racks, we installed the main support pipe, which stiffens the whole structure and locks alignment into place.
6. TRENCHING AND CONDUIT: PLAN THE PATH
We trenched for wiring back to the shop using a backhoe and shovel cleanup, then laid PVC conduit to protect the wire runs. It’s not the flashy part of solar—but it’s what makes a system clean, safe, and serviceable.
7. ROCK BED LESSON: MEASURE BEFORE YOU DUMP
Here’s the big one:
Measure, measure, measure BEFORE dumping rock.
The racks need to be 44.5 inches apart for these panels. We didn’t double-check before dropping limestone… so we got a bonus workout digging it back up and adjusting spacing.
Two more tips:
- Put bolts in before setting panels (it saves time)
- Use two people for panel installation (don’t fight gravity alone)
A few quick wiring tips that made a huge difference:
- Use zip ties to secure flexible conduit
- Use strong string + a shop vac to pull wire through conduit
- Keep wire on spools with a bar through the center so one person feeds while the other pulls
Final Thoughts: Not “Easy”… But Absolutely Worth It
This wasn’t a one-hour install—and that’s the truth most videos don’t show. But when the last panel went on and all three arrays came together, it was worth every bit of effort. We now have a solid, clean, long-lasting ground mount system that’s built for real homestead conditions.
If you’re planning your own IntegraRack install, learn from our mistakes—and build it right the first time. ☀️⚡