There are some projects that make life a little easier. Then there are projects that completely change how you use a space.
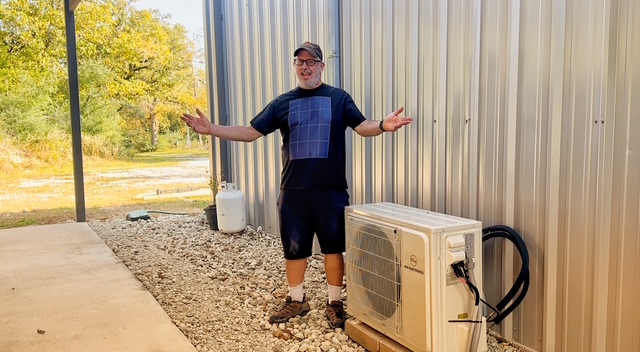
Installing an EG4 24,000 BTU Hybrid Solar Mini-Split at Terra Hill Farm was one of those projects.
Our shop is more than a place to store tools and work on projects. We use it throughout the year, and we also grow lettuce and other leafy greens hydroponically inside. In Central Texas, however, summer temperatures can make an unconditioned shop almost unusable.
Now, when it’s 100 degrees outside, we can walk into a cool shop and work comfortably. Our lettuce can keep growing without battling extreme indoor temperatures. And during the day, much of the electricity needed to keep that space cool comes directly from six solar panels.
We are using the Texas sunshine that heats the shop to help cool it.
That has literally changed how we live and work at Terra Hill Farm.
What Is a Hybrid Solar Mini-Split?
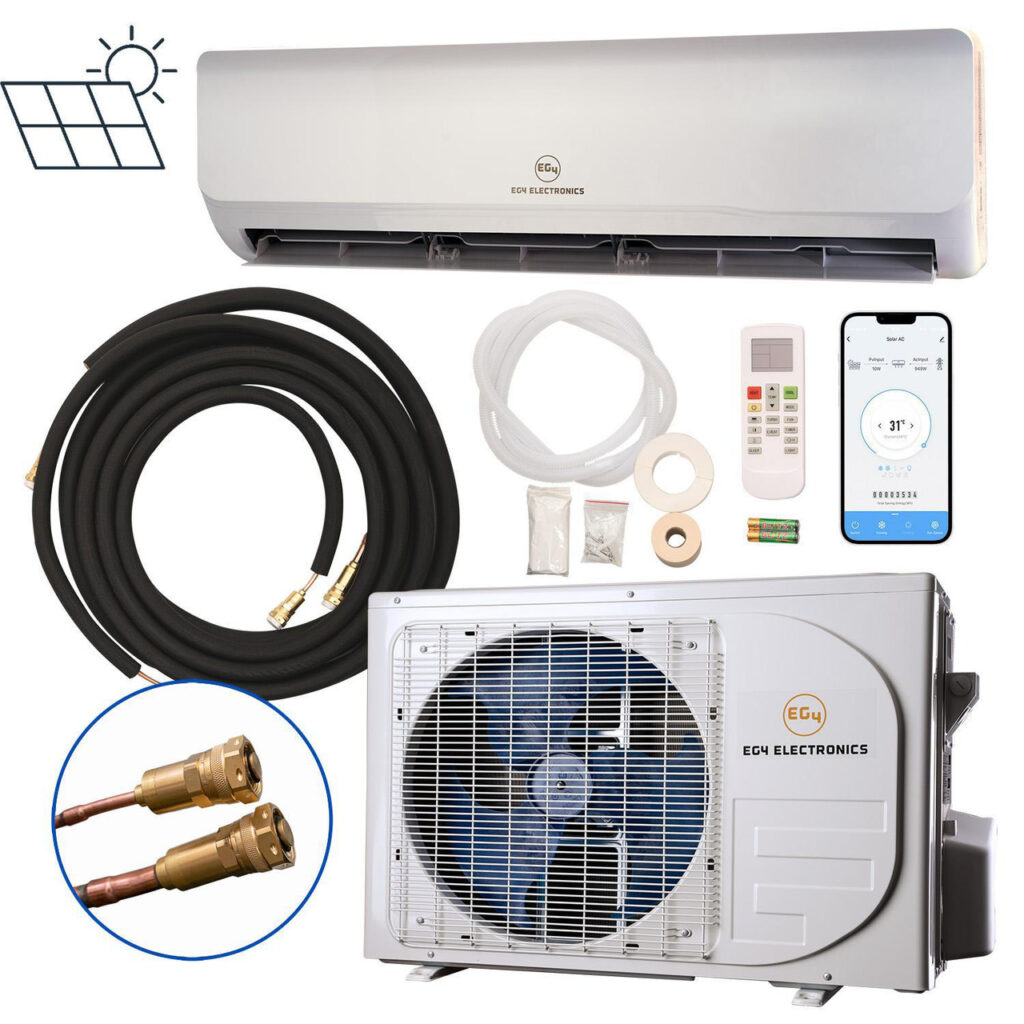
What makes this system particularly interesting is that it isn’t simply a conventional mini-split connected to a home’s solar system.
The EG4 hybrid mini-split can use electricity produced directly by solar panels. Our six 400-watt panels provide DC power to the unit during the day, allowing the air conditioner to take advantage of available solar energy without first routing that power through our home’s main inverter and battery system.
The hybrid capability also means the system isn’t limited to running only when the sun is shining. It can use AC power when the available solar isn’t sufficient.
For us, that combination made a lot of sense.
We wanted the shop cool during the hottest part of the day, which happens to be when solar energy is readily available.
Six Solar Panels on the Carport
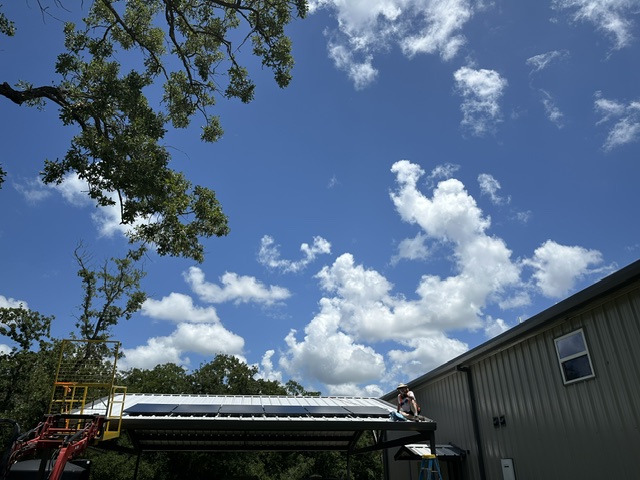
We installed six 400-watt bifacial Hyperion panels from RUNERGY on the corrugated metal roof of the carport beside the shop.
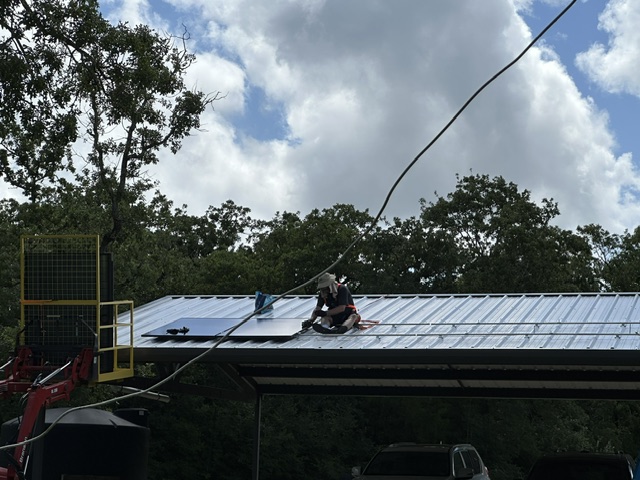
Instead of purchasing a more expensive turnkey rail system, I built my own mounting system using Unistrut and Magerack mounting brackets.
The location presented an interesting challenge. The carport roof faces west, which isn’t necessarily the orientation you would choose if your only goal were maximum all-day solar production.
For this application, however, west-facing panels have an advantage.
Our greatest need for air conditioning comes during the intense afternoon heat. Those panels can continue producing power later in the day when we really want the shop to stay cool.
I also watched the shade patterns on the roof between May and September. Because one side begins receiving shade sooner, I intentionally shifted the panels toward the area that receives more late-day sunlight.
Sometimes the best solar layout isn’t necessarily the prettiest or most symmetrical one. It’s the one that works for the site.
A DIY Mounting System
The six panels are supported by Unistrut secured to the metal roof with Magerack mounts.
This part of the project reinforced an important DIY lesson:
Measure everything before ordering your hardware.
For example, I initially purchased 35mm end clamps. They were too loose for these panels, so I had to reorder 30mm clamps.
I also discovered that some of the panel clamps came with metric bolts while the spring nuts I was using were SAE. That required changing some hardware before everything would work together.
Neither problem was particularly difficult to solve, but little compatibility issues like these can bring an installation to a halt.
For the six-panel array, I used two 10-foot pieces of Unistrut and cut another piece into shorter sections to complete the mounting structure.
Getting Those Panels on the Roof
These are large solar panels. They’re about as much panel as I would want one person handling on a roof.
I used a forklift basket on the front-end loader to raise the panels to the approximately 10-foot-high carport roof. That was considerably easier than trying to carry them up a ladder.
I did install the panels myself, but I don’t recommend working alone on a roof. Solar panels are large and awkward, and working at height introduces serious fall hazards. I used fall-protection equipment and established anchor points, but having another capable person present is the safer approach.
And if you live in Texas, there’s another consideration:
Heat.
I started early in the morning, but by lunchtime temperatures were already climbing into the mid-90s. I stopped frequently and spread the installation over periods when the heat was manageable.
A Texas summer roof is not a place to rush a project.
Three Things I Learned Installing the Panels
Once installation was underway, three practices made the job much easier:
- Begin wiring at the far end of the string.
- Run the return wire as you install the panels so you don’t accidentally trap it beneath them.
- Make sure you have enough rail and hardware before you start.
Taking a panel back off because you’re short a piece of mounting hardware is something you only need to experience once to appreciate good planning.
Connecting the Solar Array to the Mini-Split
After mounting and wiring the panels, I ran the PV wiring down the carport leg to a DC isolator switch.
From there, the wiring travels through buried conduit along the carport and over to the mini-split’s outdoor unit.
After making the connections, I tested the array and measured just under 200 volts.
Then came the moment every DIY installer looks forward to.
I flipped the switch.
It worked the first time.
The mini-split started blowing cold air using power coming from the solar panels.
Meanwhile, our house continued operating on its primary solar system and charging its batteries without a noticeable change.
Cold Air From Sunshine
There’s something remarkably satisfying about standing in a cool shop on a hot Texas day knowing that the sunshine beating down outside is providing much of the energy being used to cool the building.
I grew up near the Gulf Coast when air conditioning was something you used carefully. When the AC was running, doors stayed closed. Running it unnecessarily was simply not something you did.
That’s probably one reason this system still amazes me.
Six solar panels can now help keep our shop comfortable for hours while the Texas sun is blazing overhead.
And the benefit isn’t just comfort.
It Changed What We Can Do in Our Shop
This is where the project became much more significant to us than simply installing another piece of solar equipment.
A comfortable shop gives us a usable workspace even during the hottest months of the year.
More importantly, we’re also able to use that space to grow food.
We grow lettuce and other leafy greens hydroponically, and controlling the temperature makes it much easier to maintain a suitable growing environment during our brutal Texas summers.
So this one solar project supports several of the goals we’re working toward at Terra Hill Farm:
Producing our own energy. Growing some of our own food. Creating useful spaces on the farm. And becoming a little more self-sufficient.
That’s why I say this mini-split changed our lives. It didn’t simply lower the temperature in a building. It changed what we can do with that building.
An Interesting Way to Start With Solar
One thing I particularly like about a solar-powered mini-split is that it can provide a very tangible introduction to solar energy.
Instead of beginning with a large whole-house system involving a substantial battery bank and many solar panels, you’re putting solar energy to work on one of a home’s or building’s biggest summer energy demands: air conditioning.
For someone living in Texas or another hot climate, that’s significant.
Every property and installation is different, of course. Electrical requirements, permitting, equipment specifications and local codes should all be investigated before beginning a project.
But for us, the results have been remarkable.
On a 100-degree Central Texas afternoon, we can walk into the shop, feel that cold air blowing, work on a project or check on rows of growing lettuce.
Outside, the sun is blazing.
And instead of only being the reason we need air conditioning, it’s helping provide the power to run it.
That’s a pretty good feeling.